Alexa, turn on my workload cluster
I already have a vRealize Orchestrator workflow to shutdown my workload cluster. What I want to do is trigger that by a voice command from Alexa.
Now, the correct and proper thing to do here would be to create a new Alexa skill, write the function in Lambda and connect that to my Orchestrator REST API and execute the workflow. That way I could control the “intents” and “utterances” and have verbal feedback.
I didn’t do that for a couple of reasons. Firstly, I wasn’t happy about publishing my Orchestrator API onto the internet for Lambda to access. I could have created a VPN to an AWS VPC and executed the Lambda function in that network, thus securing the connection, but I would have to pay for that.

The second reason was that I just don’t have time to learn it - I had a quick look and created my first “hello world” Alexa skill, but it was going to take some serious time to develop, time which I don’t have!
I started looking around to see if there was something more ghetto that I could do, making use of existing code. I’ve been using a Philips Hue bridge to control my bulbs, but I couldn’t get a E14 fit bulb for my desk lamp, so I tried an Osram Lightify. This kind of works, but there were some quirks so I looked at an open source solution - ha-bridge.
ha-bridge
[ha-bridge] Emulates Philips Hue api to other home automation gateways such as an Amazon Echo or Google Home. The Bridge handles basic commands such as “On”, “Off” and “brightness” commands of the hue protocol. This bridge can control most devices that have a distinct API.
With ha-bridge I can make a REST API call, or run a script, and present that to the Echo.
I’m using ha-bridge to make my REST API calls, rather than writing any custom skills, largely because it’s a whole lot easier to do! Once you get ha-bridge up and running you can discover any “device” you’ve configured by saying “alexa, discover my devices”, and you get the basic actions (on/off) available by default. So for a simple turn on/off action, it’s perfect.
Installing ha-bridge
I’m installing ha-bridge on an Ubuntu VM - at this point it’s pretty much vanilla install.
First, some pre-requisites;
sudo apt-get install oracle-java8-jdk -y
sudo update-alternatives --config java
Now, lets create a folder and download the Java file:
mkdir /opt/habridge
mkdir /opt/habridge/data
cd /opt/habridge
wget https://github.com/bwssytems/ha-bridge/releases/download/v4.3.1/ha-bridge-4.3.1.jar
mv ha-bridge-4.3.1.jar ha-bridge.jar
touch /opt/habridge/data/habridge.config
Next create a systemctl unit to start and stop ha-bridge as a service:
sudo vi /etc/systemd/system/habridge.service
Ensure you point the correct location - I am running something on port 80 already, so I’ll configure the server to run on 8888.
[Unit]
Description=HA Bridge
Wants=network.target
After=network.target

[Service]
Type=simple
ExecStart=/usr/bin/java -jar -Dconfig.file=/opt/habridge/data/habridge.config -Dserver.port=8888 /opt/habridge/ha-bridge-4.3.1.jar

[Install]
WantedBy=multi-user.target
Reload systemctl so that it sees the new unit, then enable and start the service:
sudo systemctl daemon-reload
sudo systemctl enable habridge.service
sudo systemctl start habridge.service
sudo systemctl status habridge.service
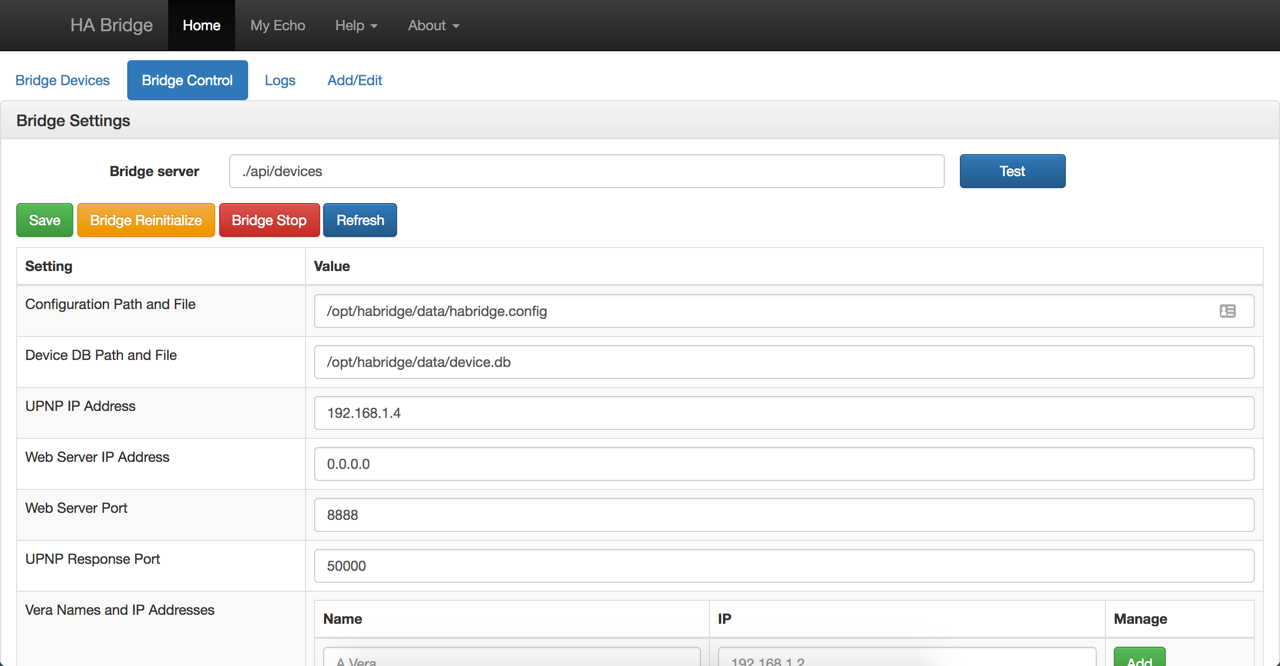
The ha-bridge web interface should now be available.
Click on Bridge Control and ensure the Device DB Path and File is the full path. Click save. Without this step the device.db isn’t saved and you can lose configured devices.

Adding a vRealize Orchestrator workflow
To power on/off the workload cluster, I need to make a POST to the vRealize Orchestrator API with the correct payload. I’ve written all my workflows to only have a single string input, so both workflows can accept a very similar JSON payload.
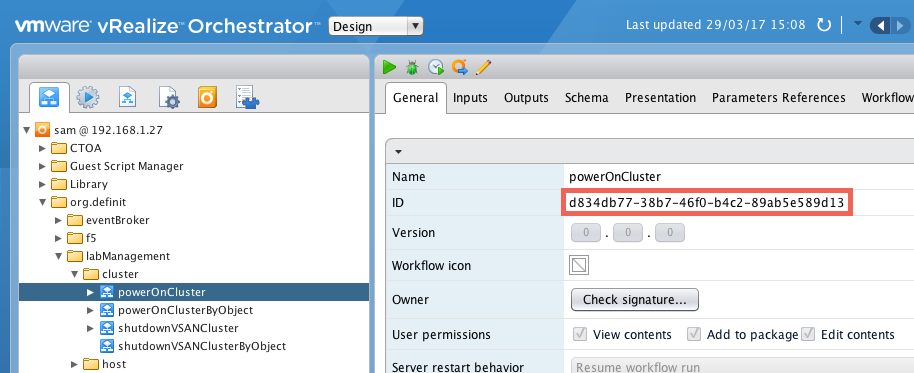
For this example, I’ll use my powerOnCluster and shutdownVSANCluster workflows. I need to get the workflow ID - the simplist way to do that is to look on the general tab (it can be copied/pasted from there)

Now I can build the REST API URLs required, in the format of:
http://[server]:[port]/vco/api/workflows/[WorkflowId]/executions/
Stop URL: http://vro.definit.local:8281/vco/api/workflows/d834db77-38b7-46f0-b4c2-89ab5e589d13/executions
Start URL: https://vro.definit.local:8281/vco/api/workflows/85cae236-c00a-4173-af24-62c4e9933dc9/executions
The “Authorization” header is a basic authentication header - I used Postman to generate the value for me from a username/password pair. The header is created in JSON format.
Header:
[
    {
        "name":"Authorization",
        "value":"Basic c2FtQGxxxNotRealxxx6bWRybjFqUTE="
    }
]Payload:
{
    "parameters": [
        {
            "value": {
                "string": {
                    "value": "Workload"
                }
            },
            "type": "string",
            "name": "clusterName",
            "scope": "local"
        }
    ]
}
Adding these into the (horrible) form is a little fiddly, so I tend to prepare the values first in my favourite text editor (currently VS Code).
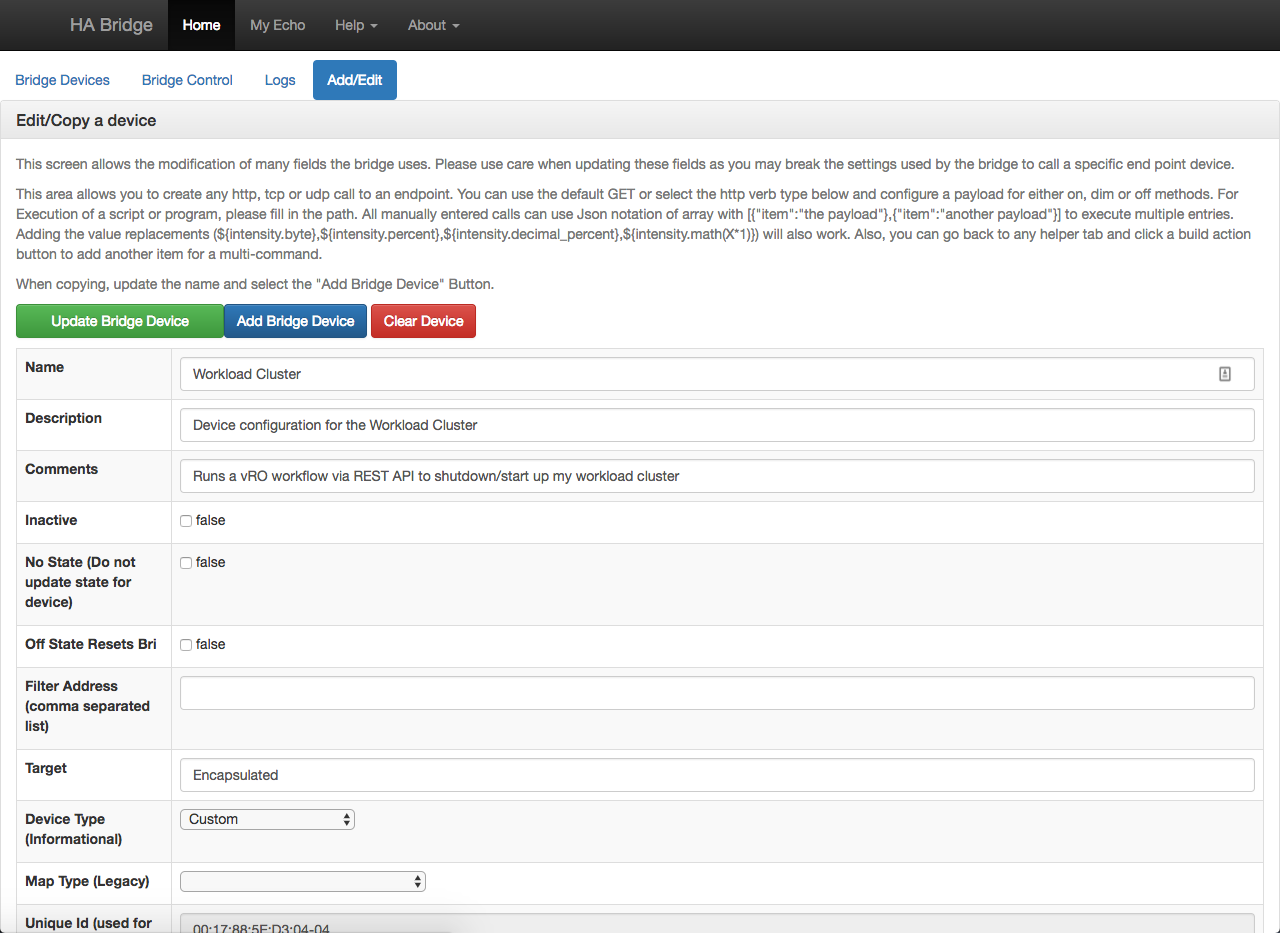
Using the Add/Edit tab, I fill out the name (this is what you will say to Alexa, so think about it - it needs to be easy to say), and description and comments if required.

Next add the action for the “On” and “Off” actions using the values we defined earlier - unfortunately the form on this page is really fiddly.
Target Item -> Workflow execution URL
Http Body -> Payload
Http Header -> Header
Be sure to use a POST verb and set the type to “application/json”

Once this is defined for both the “On” and “Off” items, save and test the workflow.
Adding the new “devices to Alexa
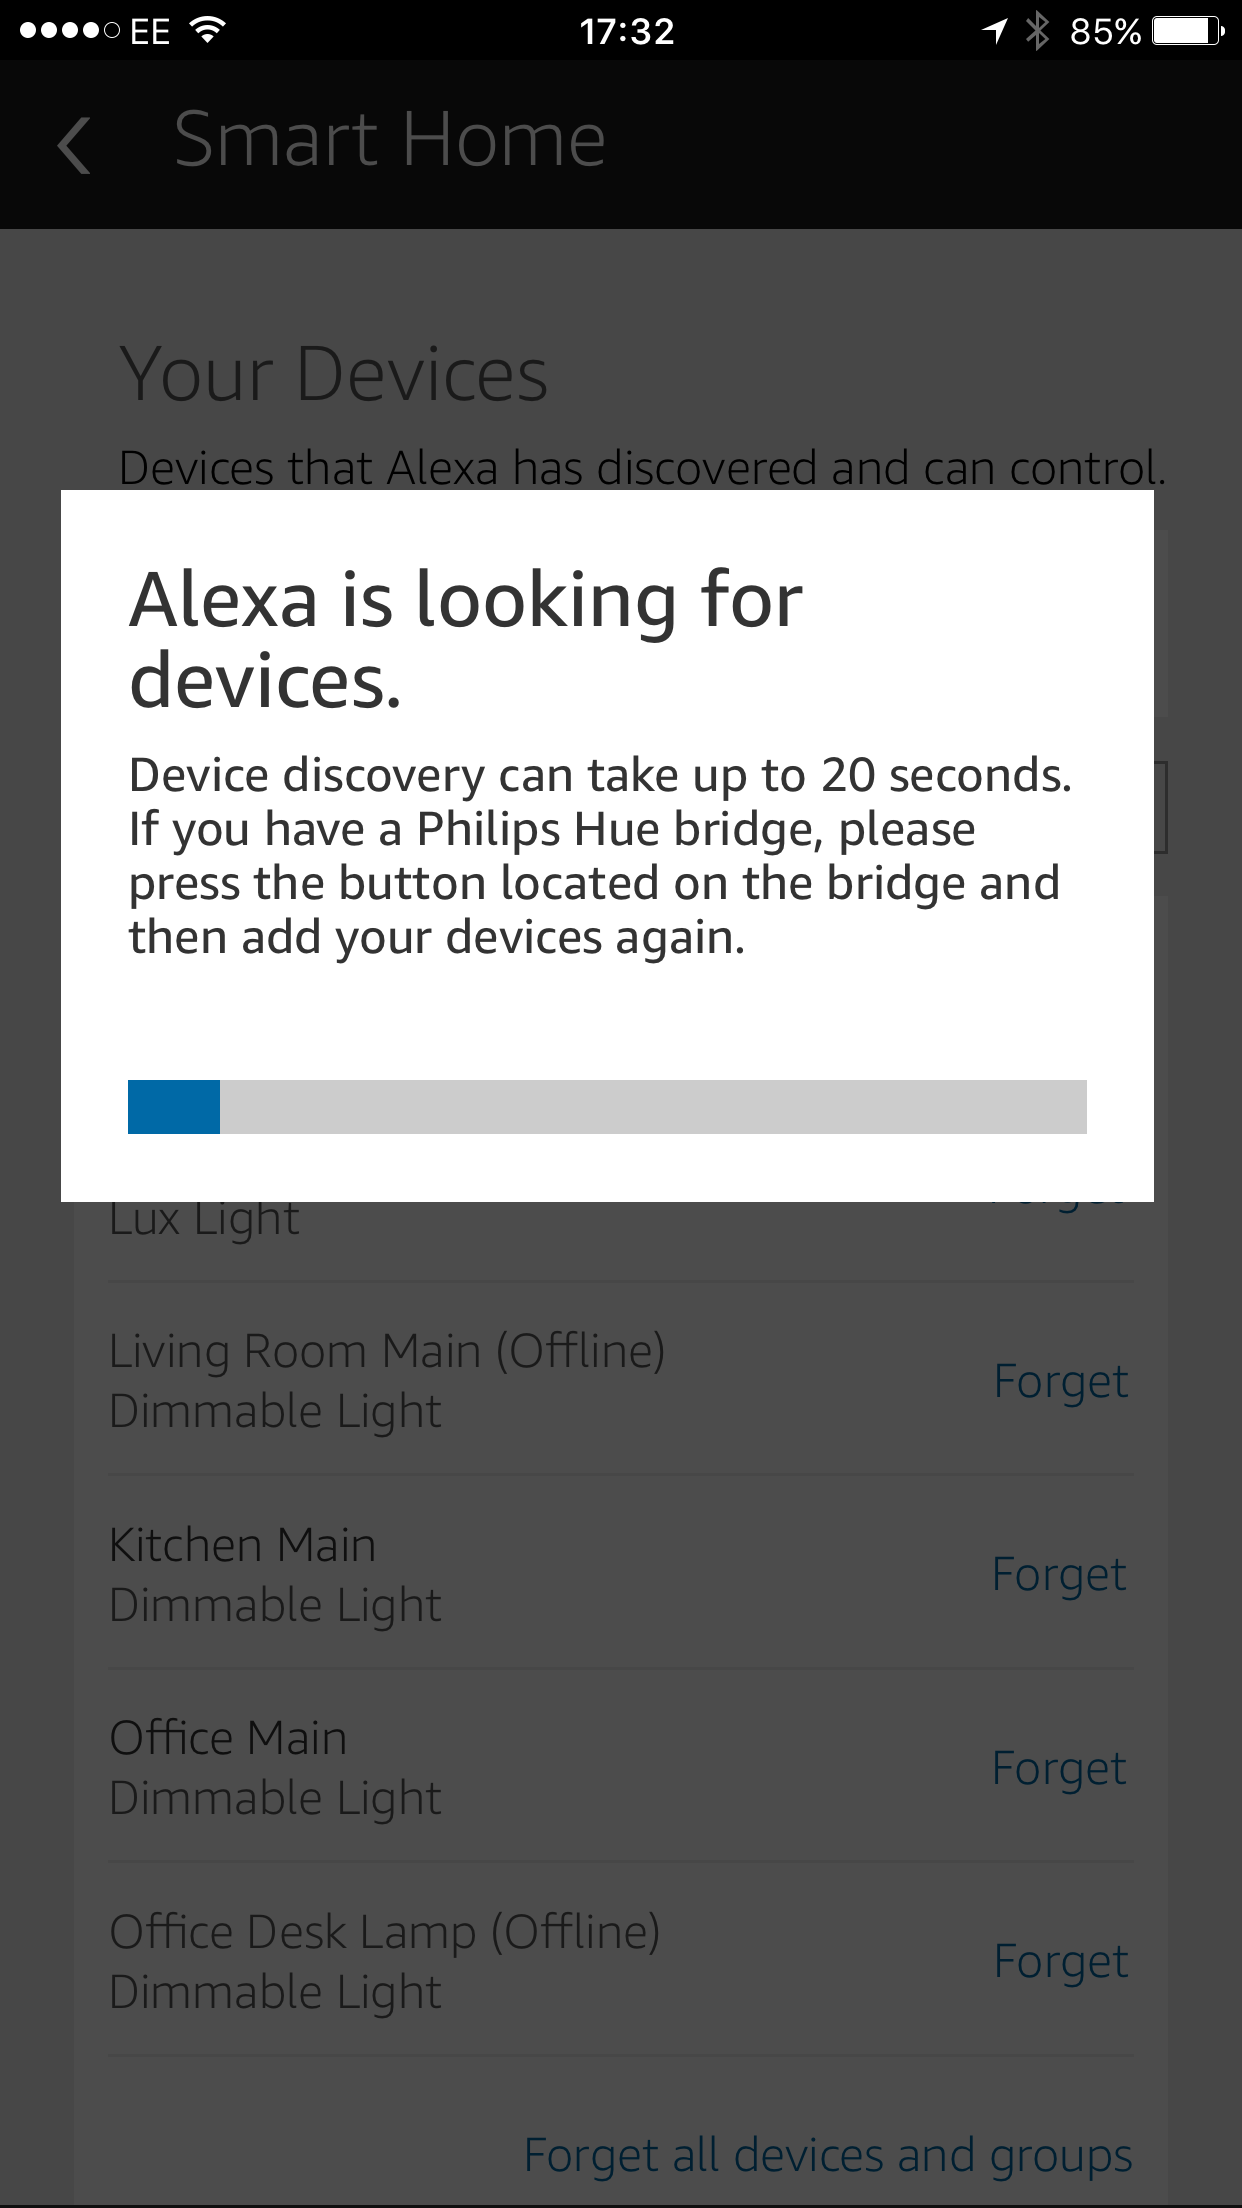
Open the Alexa app, open “Smart Home” and then scan for the new devices using “Discover devices” - you should now see the device appear!

Once the devices are recognised by Alexa, you use all the same phrases that you would with Hue light bulbs.
Alexa, turn on workload cluster
Alexa, turn off test vApp
From there, the world is your oyster. Anything you can do in vRealize Orchestrator can be added as a voice command to Alexa. I’m sure someone smarter, and with more time than me, will write some “real” Alexa integrations soon - but for now you can get basic on/off functionality, and provided you make some clever choices with device names, you can get away with a lot!
Alexa, turn on new prod Red Hat server
At which point an Orchestrator workflow deploys a RHEL blueprint (admittedly, with some default settings) in production.
Finally, if you’d like to see it in action, here is a video!

