Installing and configuring VMware Infrastructure Navigator 5.8
According to VMware, Infrastructure Navigator is
…a component of the VMware vCenter Operations Management Suite. It automatically discovers application services, visualizes relationships and maps dependencies of applications on virtualized compute, storage and network resources.
Effectively it takes a look at the network connections that are running between your VMs (and physical servers) and works out which applications and services are running on each, and the dependencies – both upstream and downstream – for each VM.
This is particularly useful in large enterprise environments where perhaps application developers have not (shock) documented the dependencies for a particular application. I can think of several times when I’ve been 100% confident that (according to all the documentation provided) I can decommission a server, or the service running on a server, only to have to turn it back on due to a production outage – because an un-documented dependency exists.
Effectively, Infrastructure Navigator leverages VMware Tools to run a netstat command on each VM and work out what connections are being used. It comes with a library of already classified services – e.g. MSSQL running on port 1433 is a pretty obvious service. Non-classified services (or services configured for running on a non-standard port) can be easily added to the library to build up a detailed picture of which VMs depend on each other (as well as “unmanaged” servers/services that are out of the scope of vCenter).
Licensing
Infrastructure Navigator comes as part of vCenter Operations Management Suite Advanced or Enterprise editions, which may put it out of reach of many SMEs. That said, for me it’s ideal use is the mapping of really complex enterprise environments where VMs and applications can number in the thousands and tens of thousands.
Prerequisites
Infrastructure Navigator comes in the form of an OVA which deploys a single VM, this has 2 vCPUs and 4GB of RAM (though I’m running it in my lab with just 2GB). It requires about 20GB of disk (but can be thin provisioned) and a Gigabit Ethernet connection.
vCenter Infrastructure Navigator is supported on vCenter Server 5.1 U1 and 5.5, with the vSphere Web Client 5.5.
In addition to all builds of ESXi 5.x, a lot of previous ESX/ESXi versions are supported, check the product interop matrix for specifics.
Deploying the vApp
At this point, I made a cup of coffee while the vApp deployed. Once it had completed I took a look at the virtual machine. I also took the opportunity to edit the settings and drop the RAM to 2GB. You can see that the appliance is a SUSE Linux Enterprise 11 64-bit VM. The VM tools are 3rd party, which really bugs me – if anyone can make sure that their VM runs the proper and up-to-date VM tools you’d think it’d be VMware right? Anyway…the VM is deployed correctly, so power it on.
Some Initial Configuration Steps
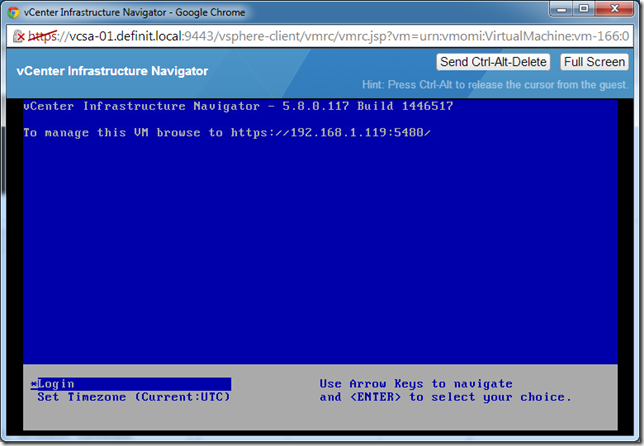
Once the VM was booted, I opened the console and it tells you where to go to manage the VM – in my case

You can log in using the user name “root” and the password that you specified in the vApp deployment. You get a fairly familiar looking web interface for some basic appliance management:

I went to the network tab and updated the network settings to use a static IP that I’ve pre-defined for the appliance. If you re-IP the appliance after you connect to vCenter, you’ll need a reboot to continue working with it.
If you want to change the hostname for the appliance, you can’t use the hostname command, or edit the /etc/HOSTNAME or /etc/hosts files – they will not persist across reboots. There’s a script that runs when the appliance reboots that checks the reverse DNS lookup for the primary IP address, and sets the hostname accordingly. If the script can’t see a DNS entry for the IP it will rename it to localhost.localdomain. (Credit to Juan Rey for this info)
Configuring vCenter Infrastructure Navigator in vCenter Web Client
If you’re still logged into the vCenter Web Client, you’ll need to log out and back in again to see the Infrastructure Navigator components.
Assign a license key
Configure Infrastructure Navigator’s access to VMs
Viewing Dependencies
Now that it’s installed and running, I couldn’t finish without a really quick view of it working, and how to add a definition for an unknown service.

 Written by